Wednesday, February 26, 2014

"Uglydoll"


My friend is having a little nephew in a couple months, and asked me to make an Uglydoll-style stuffed animal for him. I'm not about straight plagiarism, so I did some google-ing, and then built on their product, using the fabrics that I had. This toy got swirly eyes, and a navy blue backside. I used some felt I had for the eye pupils and the mouth. And I finished off all the poly-fill stuffing I had left!

Monday, February 24, 2014

Harvest Hexagons


A year or two ago, I made a hexagon blanket out of some yellow wool yarn that my grandmother had given me (and given me a lot of). I gave the blanket to my sister, as she had a friend with a baby that was only wearing/using natural fibers. Apparently that baby loved the blanket, and the couple now has a second baby, who also loves their older sibling's blanket. My sister asked me if I'd be willing to work on a second blanket, for the second baby. She said she wasn't sure if Baby 2 was more attracted to the wool or the hexagons (or perhaps just Baby 1's possessions), so I decided to pick up some more wool, and revisit the hexagons.

Baby 1's blanket was yellow, but for Baby 2 I got to pick the colors, and chose to go with a leaf green and cream. I organized these hexagons in stripes, and this blanket is more rectangular than the first (if I remember right, the first ended up shaped like a large hexagon). I used some of the leftover green to go around the edge once in a single crochet border. I'm still not totally satisfied that I can't get these hexagons to lay flat, but that's something to keep working on.

Saturday, February 22, 2014

The Dark Scraps


This project was conceived as a way to get rid of, at least reduce, my stock of "dark" scraps (I save teeny skein remnants in either a dark pile or light pile- the light pile is easy to make baby hat brims and such out of, the dark pile tends to stick around). I did have to buy the gray yarn, but the other colors from the stripe and the border all came out of the scrap pile.

I chose to use a different stitch for the stripe, that would utilize the different colors by sending a spike from one row down into the previous row, creating a more interesting effect than just stripes layered on top of stripes. As I got closer and closer to the end (I made the smaller section of gray first, then the larger one), the gray felt like it was getting overwhelming and dreary. The dark scraps hadn't been completely decimated yet, so I decided to use some more of them to create a small, two row border. I just used a basic single crochet stitch for this, using back loops only so that the colors would be more visible, especially in the inner row.

Saturday, February 8, 2014

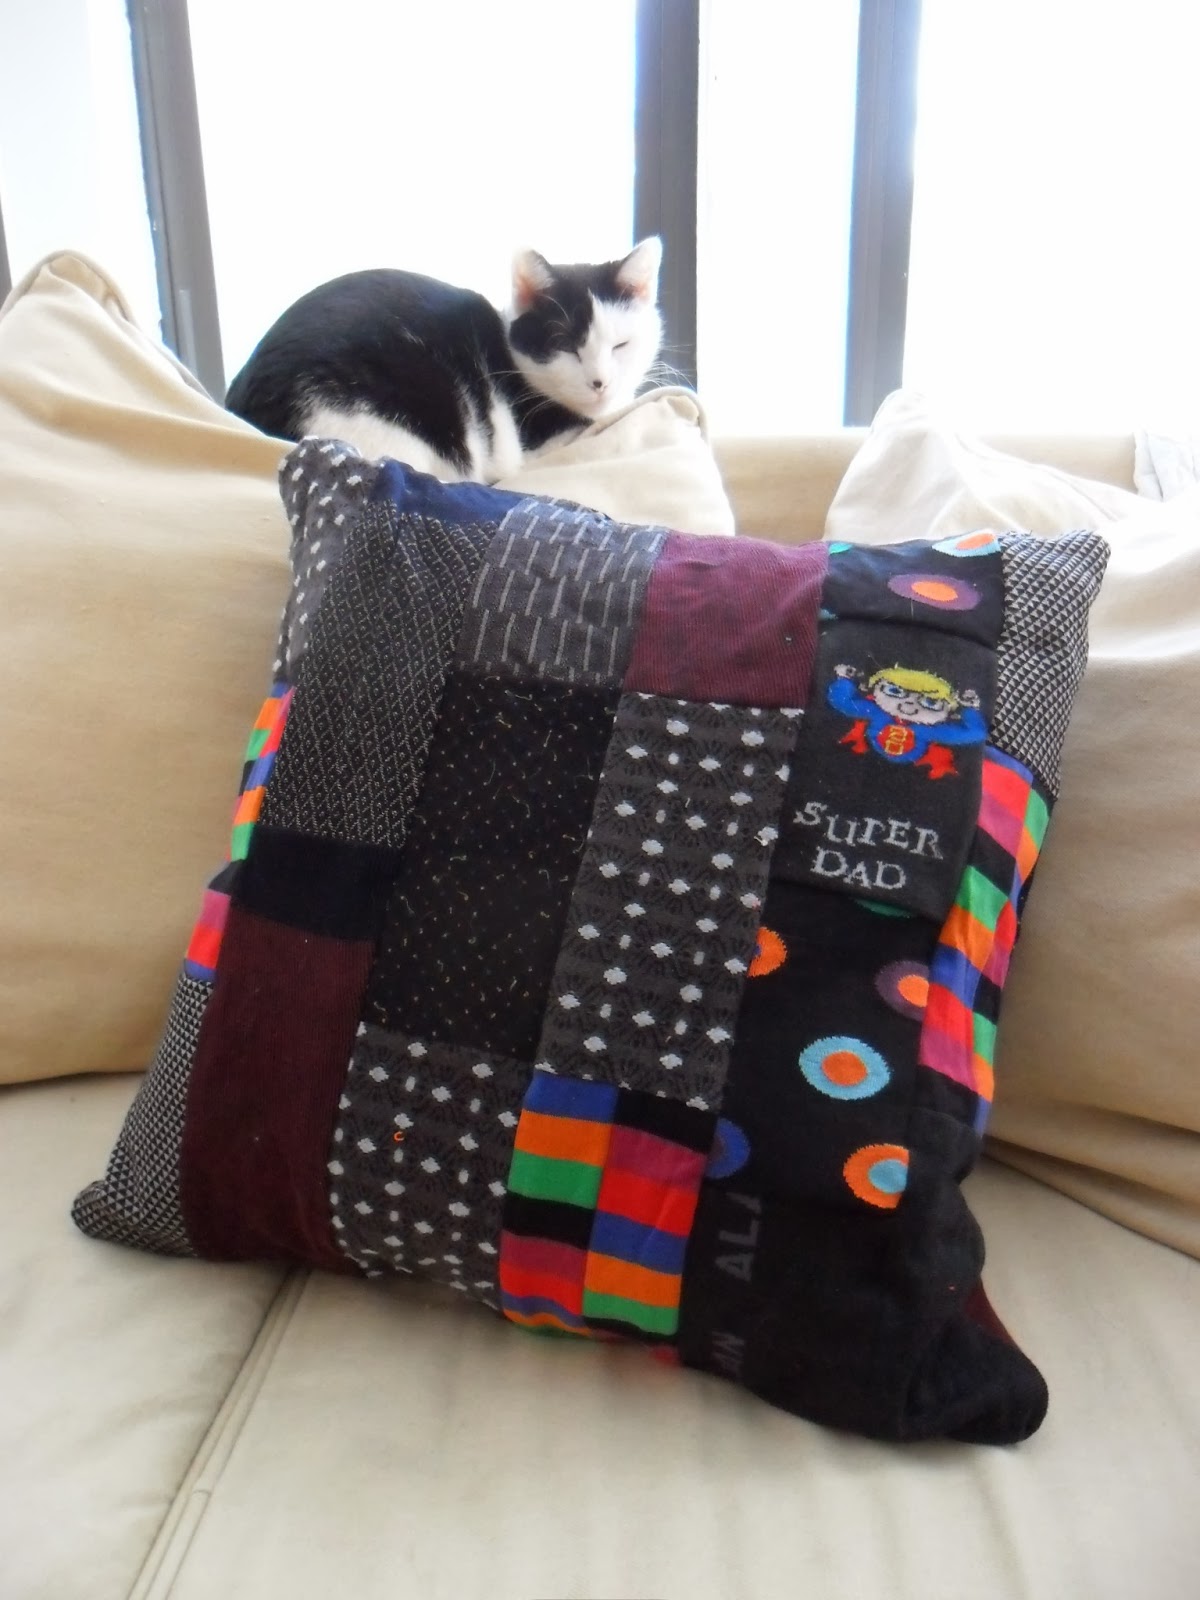
The Sock Pillow


I was hired to create a pillow out of socks. My client said she wanted to do something for her father, who was well-known for his many-colored socks, but no longer needed them. She thought a pillow might be a good way to use them, with the ultimate goal of giving the pillow to her father to continue to enjoy his socks.

We met, and we went through the socks that she had, picking out the ones that were special to her and her father.

I chose to use the leg part of the sock, as that was the part of the sock that had the most usable fabric for me, and would best be able to represent the patterns and colors on the socks. The binding at the top is tighter than the leg part of the sock, and the heel piece won't lay flat. In addition, the part of the sock that goes around the arch of your foot is pretty short and small when not being stretched by your foot.

First I measured all the socks, laying flat, and decided on a couple different sizes of blocks to create (using the measurements of the pillow form to ensure that it would all match up correctly. I then made three different pattern pieces for each different block size, and started cutting the socks up. Some laid flat wider, and I was able to get four blocks out of the pair of socks, others were tighter and laid flat narrower, and so I had to cut them open to create a block wide enough, resulting in two blocks for the pair of socks.

Once the blocks were all cut, it was just a matter of putting them all together, first in columns, and then organizing the columns so that two of the same sock didn't end up exactly next to each other. I did end up with a couple that matched around the edges, but it was more important to me to make sure that when a side of the pillow was laid flat, that none on that side matched up.

After both sides were sewn together around the edges, I attached the top corners of the pillow form to the top corners of the sock-pillow case to keep it from moving around too much inside. I then turned the casing right side out around the pillow form, and hand-stitched the gap in the bottom closed.

My client was very happy with the final product, and I was very happy to have had this project to work on! It provided a couple new challenges for me, sewing-wise, and gave me an opportunity to do something different from what I have been doing recently, and what I have done in the past.

Monday, January 27, 2014

Why Not? Blanket

The yarn was on clearance. I bought all that they had, and made this little blanket. Yarn was super chunky, so I went with the new square pattern that I learned two posts ago- to avoid having too many huge holes. Blanket is thick! Warm! About a yard x a yard.

Sunday, January 19, 2014

Small Multi-color Afghan


A long while back, I had some odds and ends in some brighter, pastel colors, and I decided to work it all into little squares, as there wasn't enough of any of them to work out a pattern for something larger. After finishing a couple more projects, and discovering a bag full of old yarn at my parent's house, I had some more scrap yarn to work with, and made up more squares to go with the original batch.

Each square is about 4 inches wide/tall, and I decided to make this blanket 10 squares by 10 squares, to make it larger rather than smaller. It did end up pretty big for a baby; my mom said that it was about "crib-size", but I could also see it being about the right size for a toddler. It's pretty gender-neutral, doesn't really scream all pink! or all blue!. I also added a border around the edge, of one row of single crochet and another of half-double crochet to hold it all together, weave in seams, and add some sturdiness to some of the slip stitch edges on the squares. I used the same white for the border as I used to slip stitch the squares together on the back side.

I did still end up with 3 extra squares, to start off the next little-square project.

Thursday, January 2, 2014

Green Afghan- New Square Pattern

I learned a new pattern for a granny square, and decided to make an afghan out of it. This pattern is a little less holey than traditional granny squares, and has an X-shape built into the pattern. I had to learn how to make 'clusters' to make this pattern, but once I had made one or two of these squares I had it down. I think it turned out pretty nice, and I like knowing how to make more than just my standard square. This blanket turned out to be a pretty good size, as pictured. The entire blanket was done in a light green color, and there's a two row, single crochet border around the edge to hold it all together and tuck in loose yarn ends.

As a reminder, since I know a couple of my friends out there are on their way to becoming aunties and uncles- unless I mention that a project was for someone, all blankets and hats are up for grabs, until donated to charity. Hats go to the UIC hospital, blankets get donated through Project Linus ( http://www.projectlinus.org/ ) to various hospitals throughout the area. So: this afghan could be yours, for your home or as a gift for friend or family member, just let me know if you want it! Otherwise, it will go on my pile and eventually be donated to Project Linus.